A Guide to Scanning in Challenging Environments
Emesent Hovermap uses Simultaneous Localization and Mapping (SLAM) technology to understand its location and generate accurate point clouds. Following years of research into drone autonomy, Emesent’s SLAM algorithm is highly reliable in challenging underground and other GPS-denied settings. However, SLAM differs from tripod-based laser scanning in that the captured results are more dependent on identifying features in the environment.
Tunnels and culverts are some of the most challenging environments for SLAM scanners. The lack of features in these environments can lead to SLAM slipping, resulting in an inconsistent point cloud that may be unusable for its end purpose.
In this post, we’ll walk you through scanning a challenging culvert and point out some tips to ensure that you get the best result every time. If you’d like to view the point cloud we used in this guide, you can download the dataset here.
By Ryan Palfrey & Andrew Palmer
WHAT MAKES THE CULVERT CHALLENGING?
The culvert that we’re scanning is 130m long and is quite narrow at 3m wide x 3.5m tall.
It has a smooth floor, ceiling, and walls, and the environment at either end of the culvert consists mainly of trees and a creek.
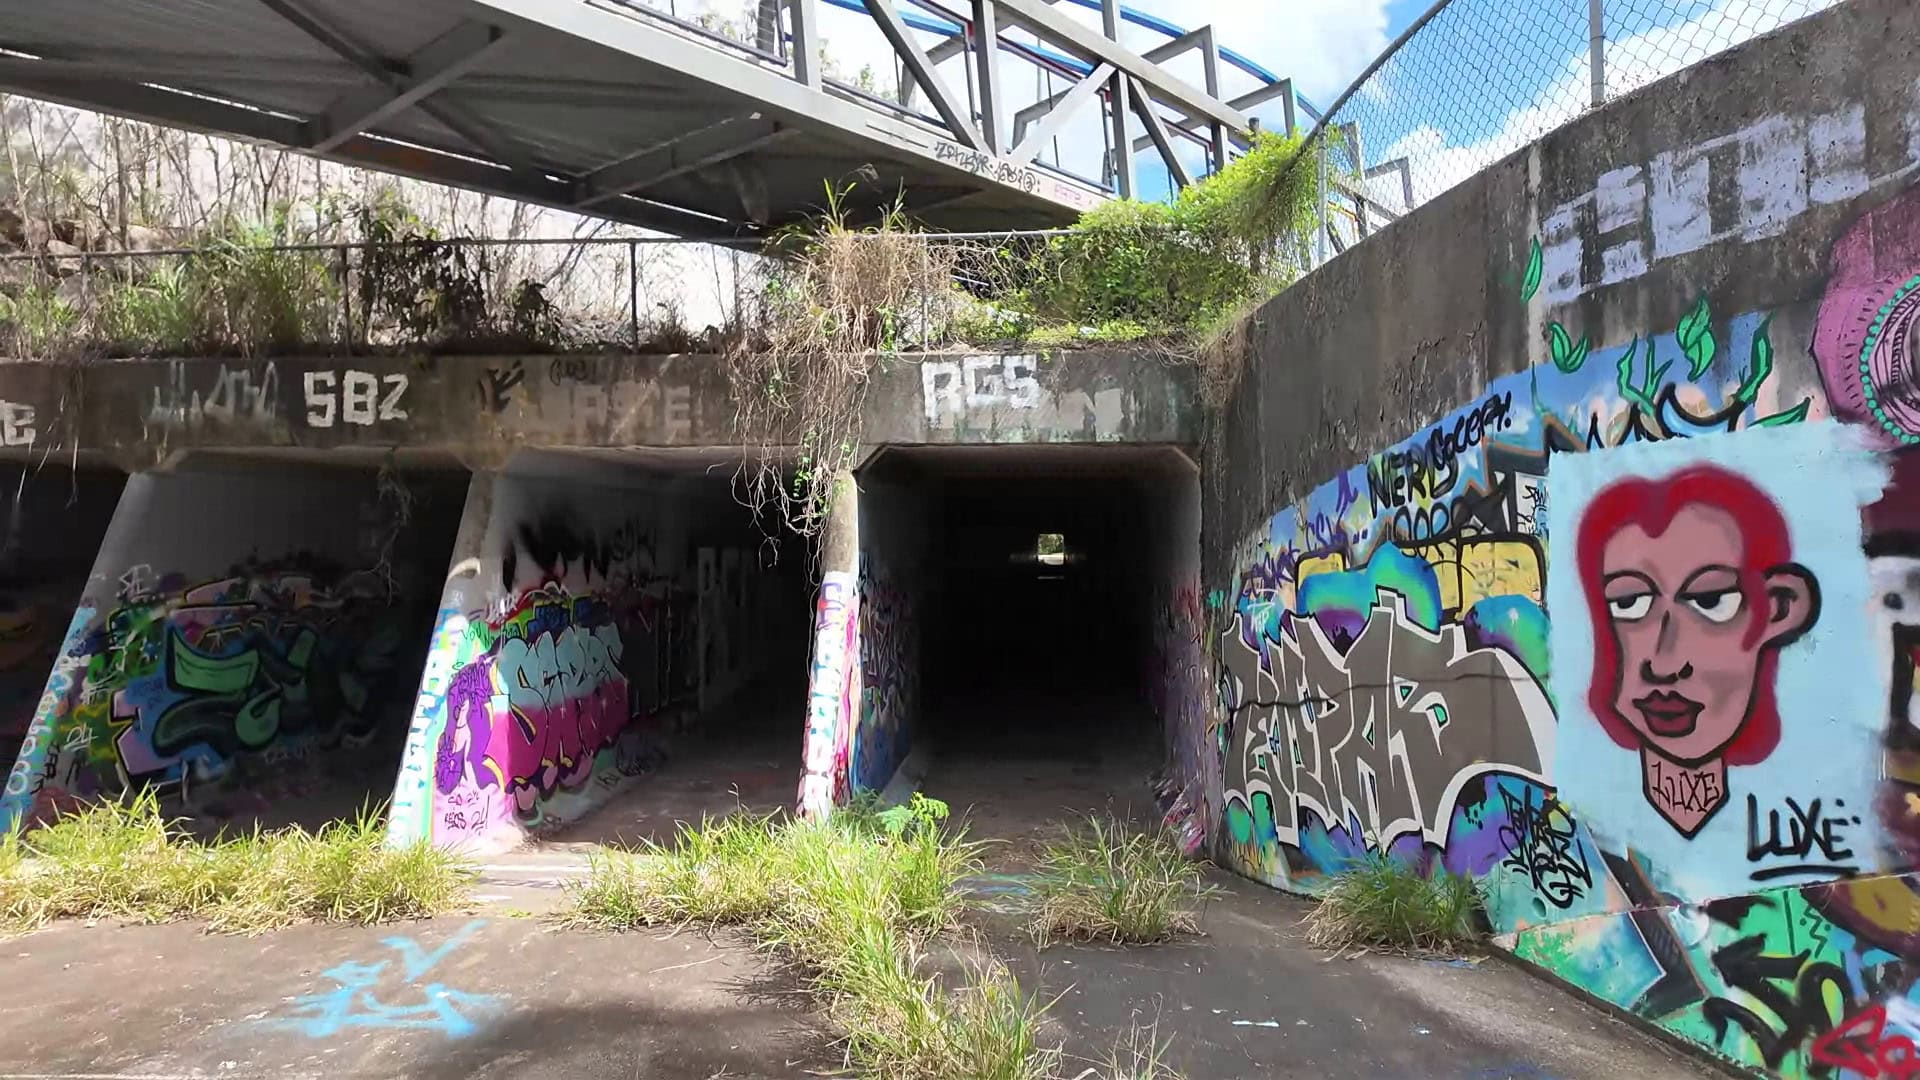
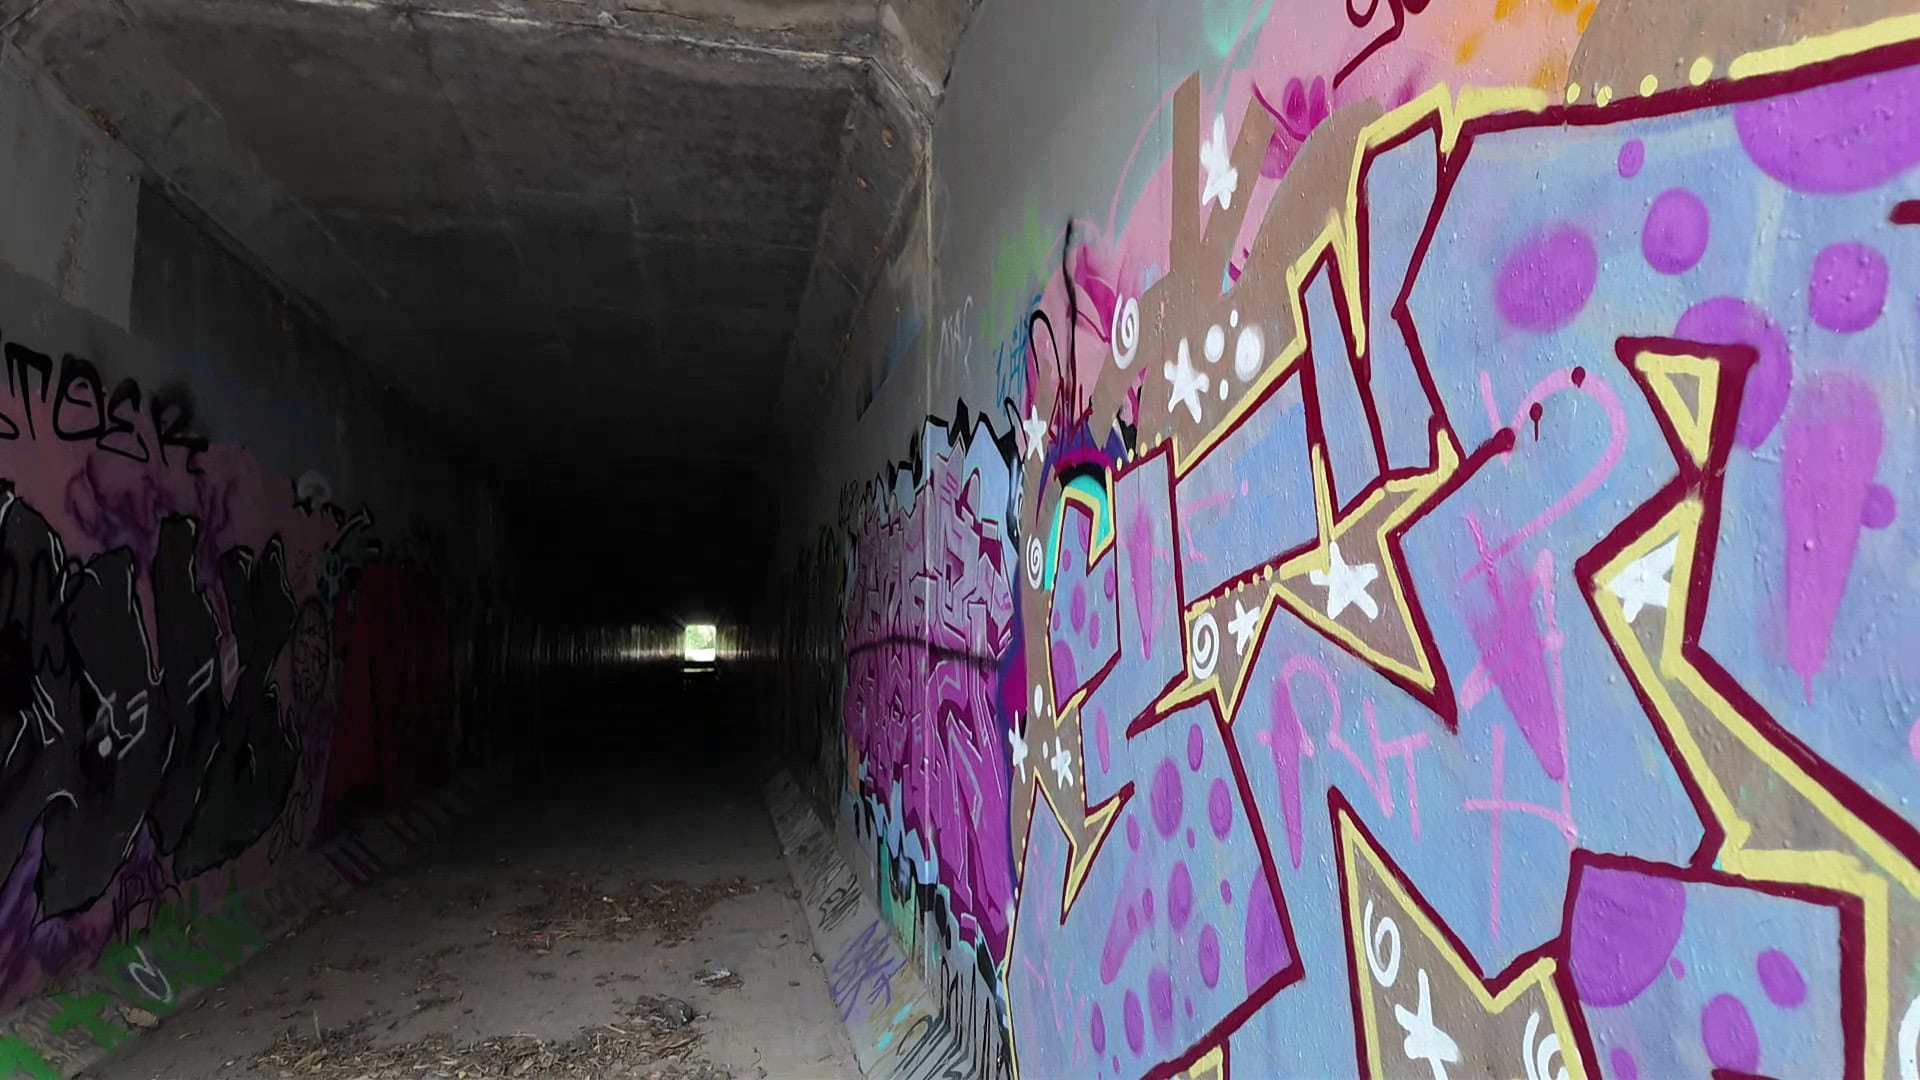
SLAM uses surfaces in the environment to determine where the Hovermap is. The walls, floor, and ceiling of the culvert are excellent features that allow the Hovermap to know precisely where it is within the cross section of the culvert, but do not provide any information as to where the Hovermap is along the length of the culvert.
In the absence of any other features in the environment, SLAM is very likely to slip in this direction.
TIPS FOR COLLECTING DATA IN LOW-FEATURE ENVIRONMENTS
The best thing that you can do is to hold the Hovermap so that it can view both ends of the culvert; for example, hold the Hovermap out to the side.
Since there are no features in the culvert that can be used to determine its position along the length of the culvert, SLAM instead relies on features at either end of the culvert. Ensuring that both ends are visible as much as possible is key to minimising the risk of SLAM slip.
In addition, try to position yourself so that the Hovermap is in the centre of the culvert, and avoid fast or jerky movements.
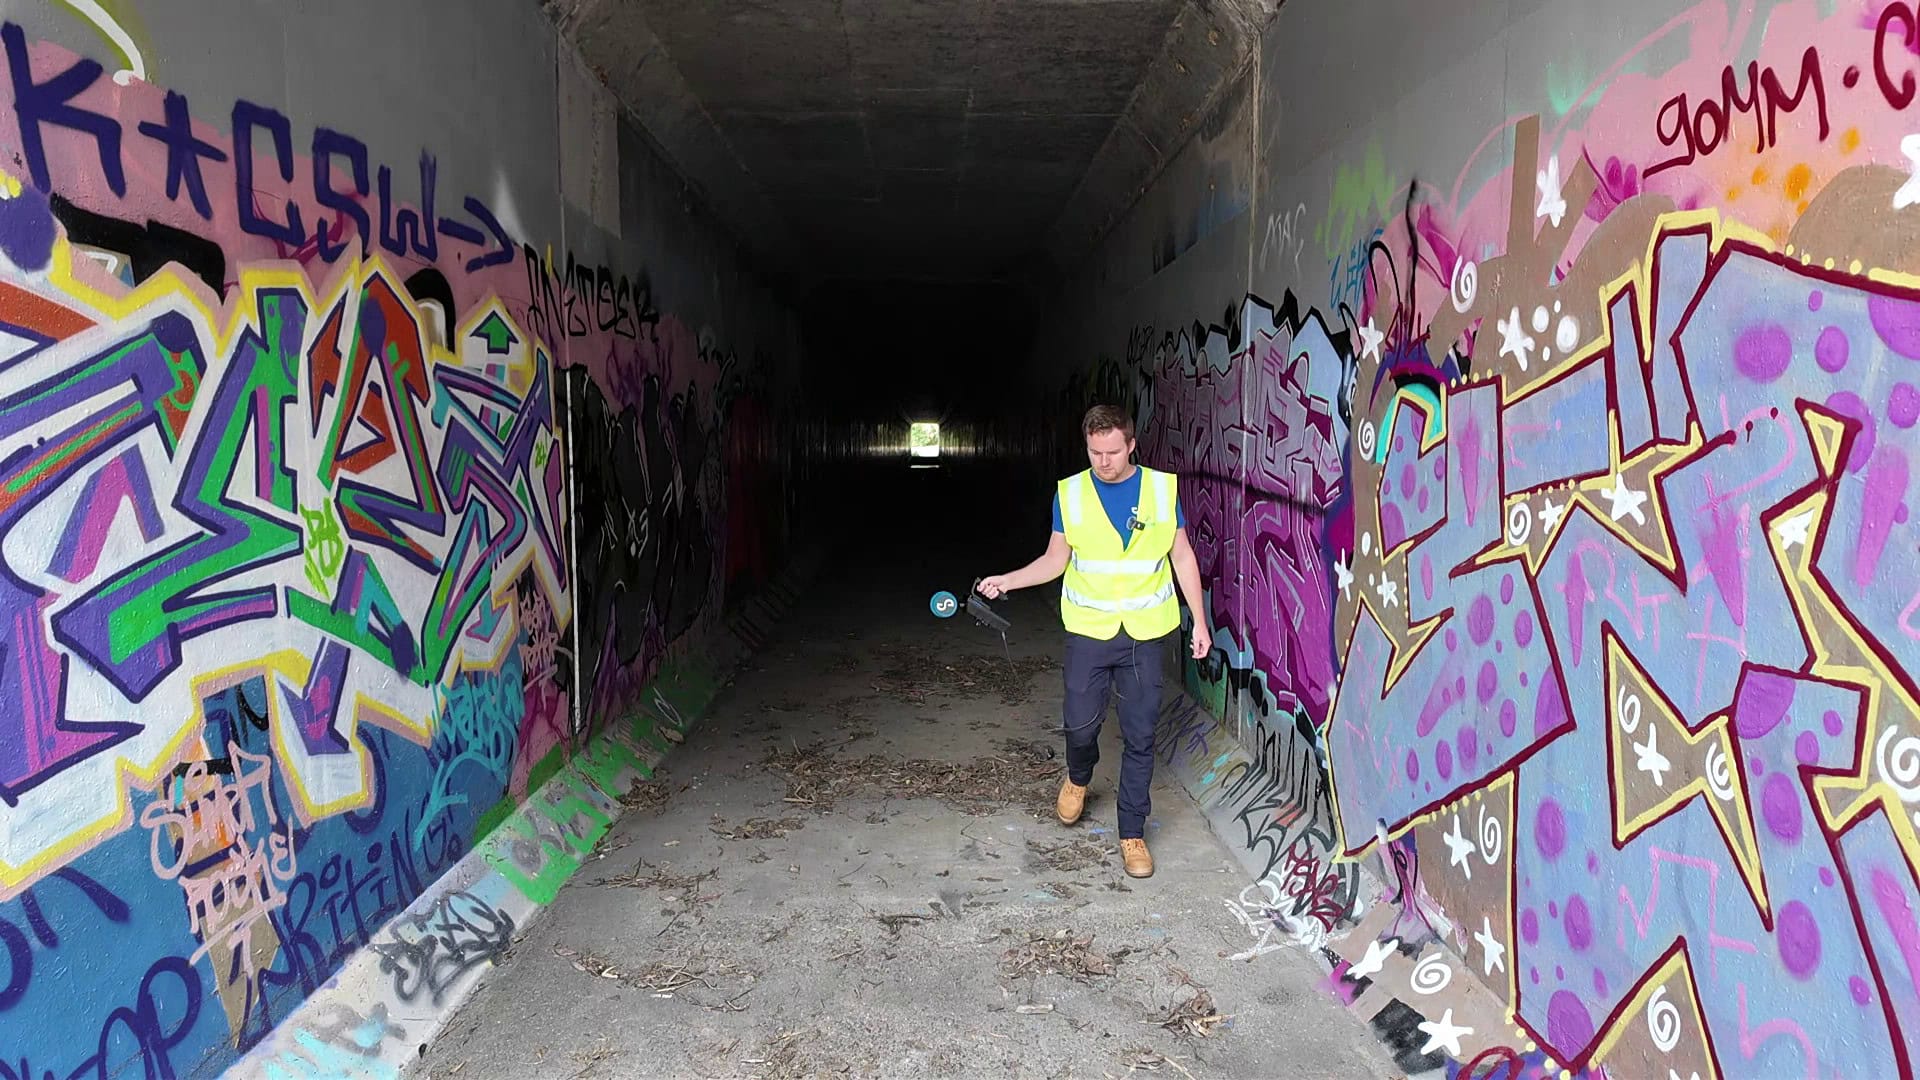
Due to the low number of features in the culvert, you want to avoid introducing negative features. Negative features are things in the environment that can confuse SLAM, such as moving people and vehicles, water, and fog. If you need to be accompanied by someone for safety reasons, get them to walk on the opposite side of you to the Hovermap so that they are in the blind spot and don’t contribute negative features.
If all else fails, you can add your own features to the environments. For example, place large cardboard boxes every 50m or so. You need to ensure that these do not move during the scan so that they don’t become negative features.
PROCESSING THE SCAN
We collected scans of the culvert in two configurations:
- Holding the Hovermap out to the side with no one following
- Hovermap attached to the backpack accessory with someone following
The first scan processed without slip using the default settings in Aura.
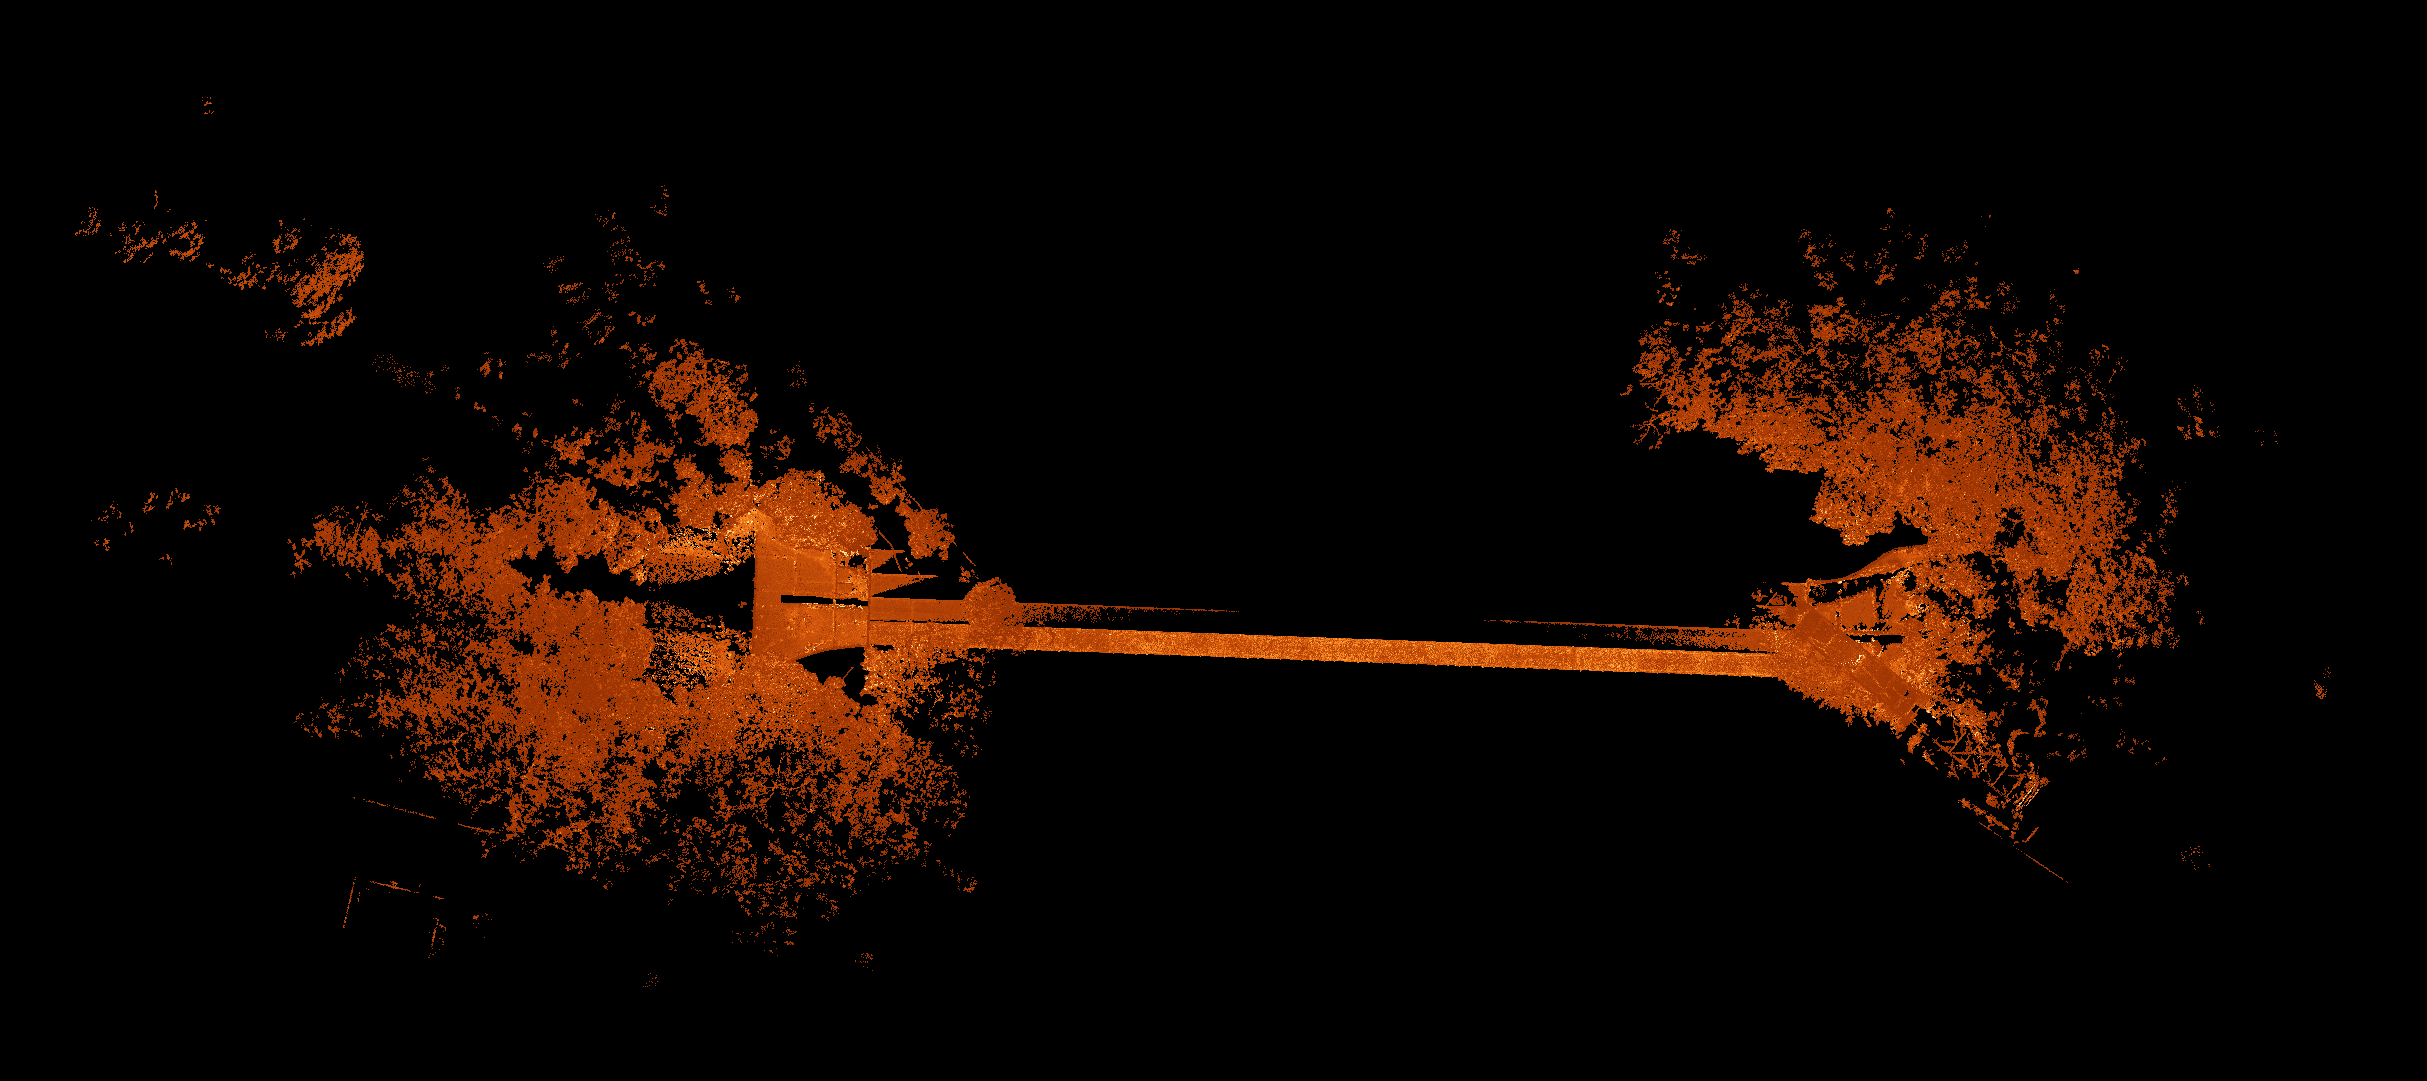
Graffiti in the tunnel can be used to show that there was no slam slip.

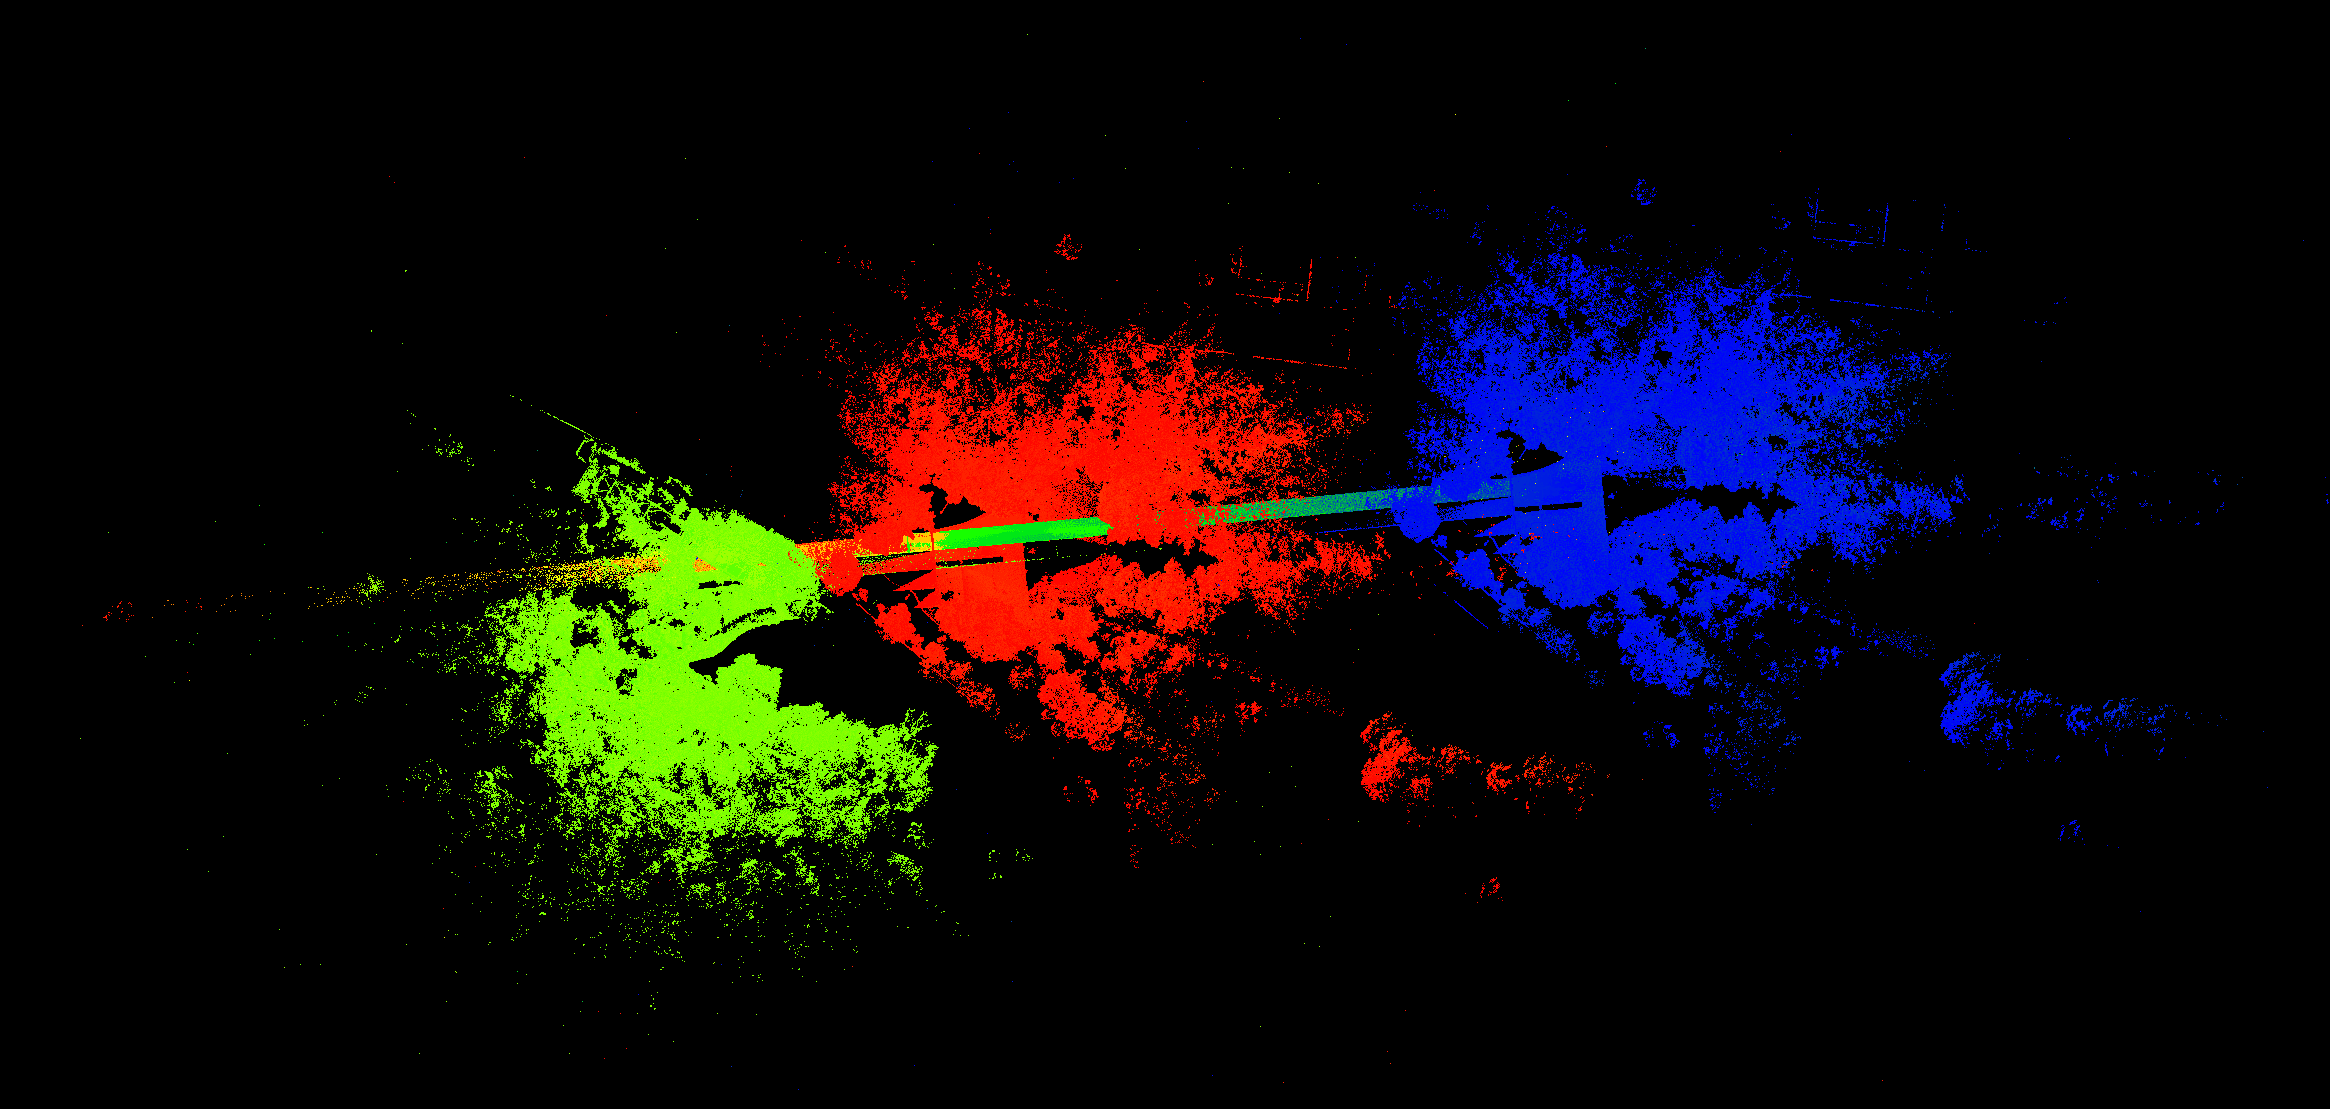
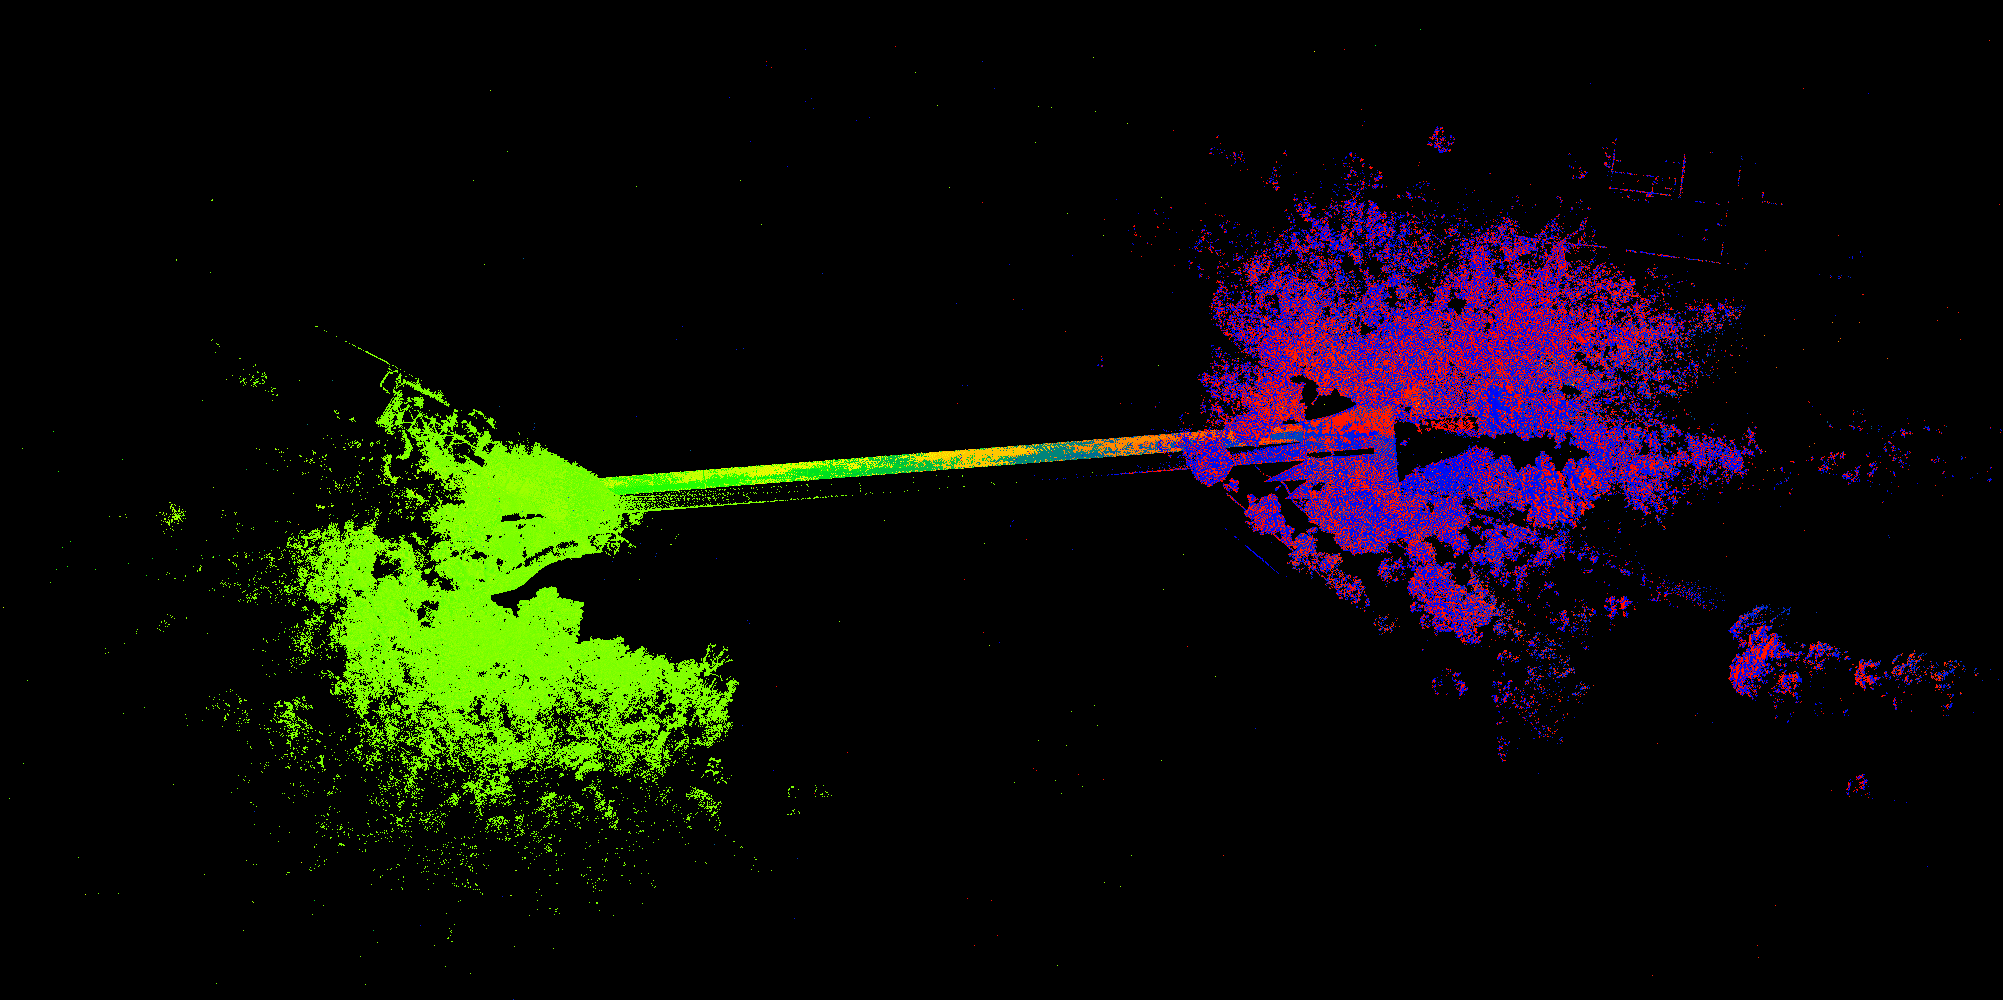
The second scan did not process without slip using the default settings as a result of the restricted field of view from being mounted on the backpack, plus the addition of negative features from the person following. Colouring the scan by time highlights when SLAM slip has occurred. In the tri-color image, the scan started at the right side of the culvert, and walked through the culvert and back again. On the return journey, SLAM has slipped quite dramatically and, as a result, the end of the scan does not line up with the start of the scan.
This image shows the scan coloured by time (blue->green->red). The blue and red parts of the scan are the start and end respectively, and should line up.
AURA PROCESSING SETTINGS
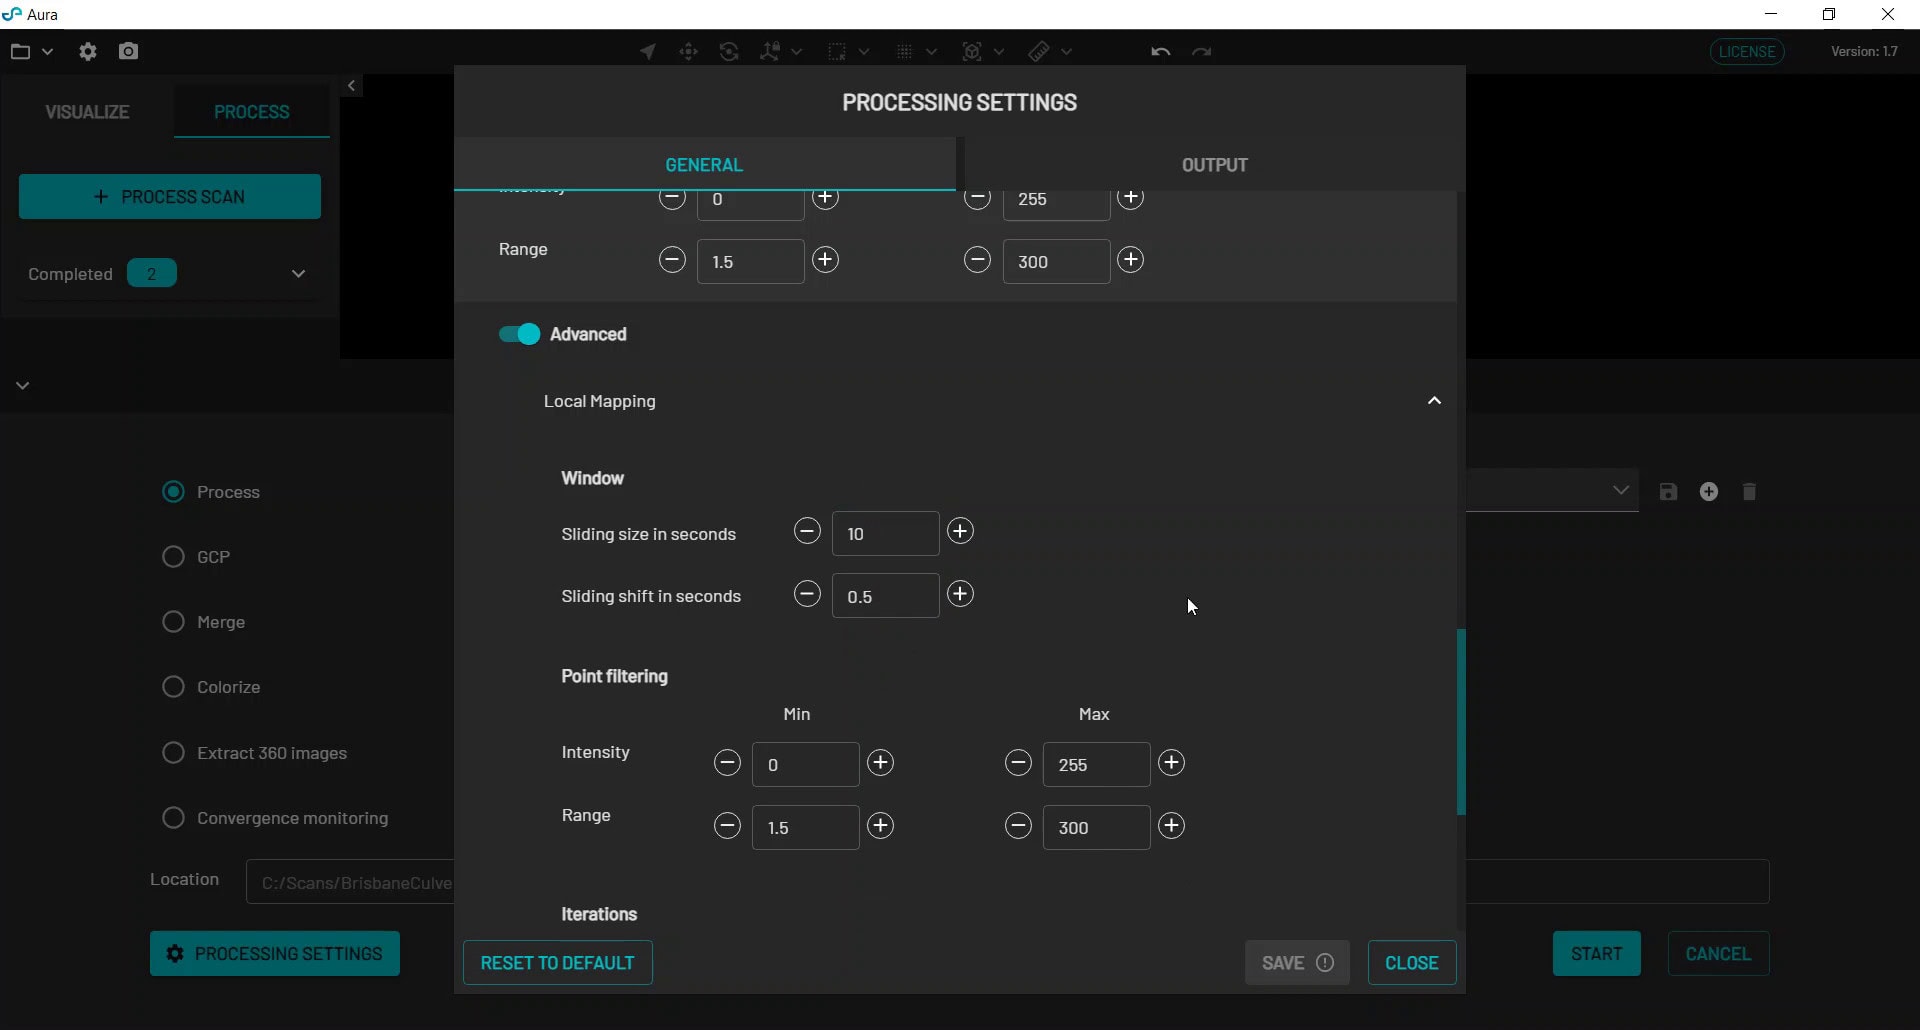
There are some settings that we can change in Aura that can help reduce slam slip.
Under Advanced->Local Mapping->Window, change the Sliding size in seconds from the default value of 5 to 10, and the Sliding shift in seconds from the default value of 1 to 0.5. Note that modifying these values in this way increases the processing time of parts of the SLAM pipeline by 4 to 5 times.
With these modified Aura settings, the scan now successfully processes without any slip, and the start and end of the scan perfectly line up.
If at any time you require advice on a challenging scan, don’t hesitate to get in touch — we’re always happy to assist.
In the meantime, if you’d like to view the point cloud we used in this guide, you can download the dataset here.
